Design
This semester, I created a loft organizer for my college dorm bed next fall. I wanted to design and build a storage unit so I wouldn't have to get up and down from my lofted bed for simple things like charging my phone and getting a pencil. During the design process, I thought of everything I would possibly need from my bed. I made a list and thought about ways to compact it into one storage unit.
Inventor
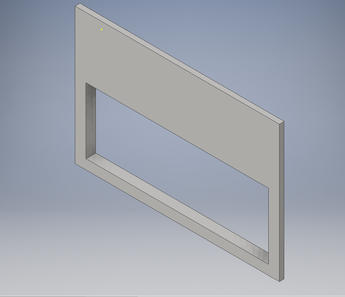
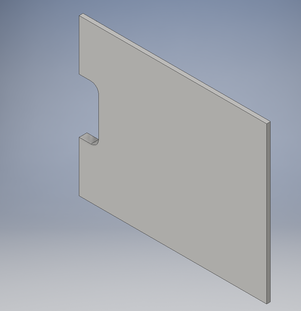
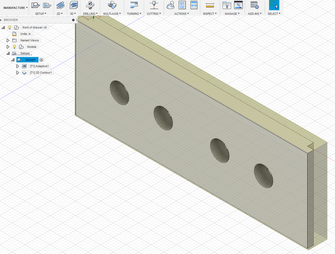
After creating my model for my project, I started creating the individual pieces in Inventor. I created 13 pieces total. I made a groove on some of the sides of my pieces so when I glued the pieces together there would be three surface areas for the pieces to fit together. After I was done making all of the individual parts, I assembled them in Inventor to make sure the pieces would fit together.
|
|
Fusion 360
After I made all of my parts on Inventor, I exported them to Fusion 360. First I changed the file to manufacture and then I changed the units. Next, I created a new setup and set the x, y, and z. Then I selected a 2D contour and picked my tool path. I chose a quarter inch flat end bit, changed the stock to leave to zero, and changed the maximum step-down to a quarter inch. Then I created a 3D adaptive clearing to cut out the grooves on all of the pieces, and to cut out shapes if they were a part of the design of the piece.
|
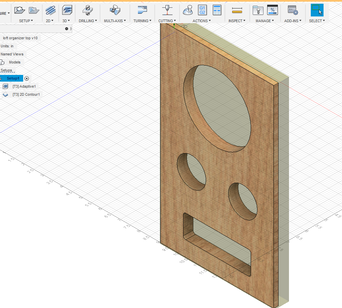
|
CNC Router
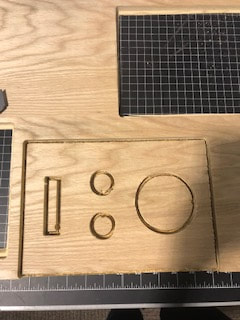
I exported the files so I would be able to cut out the pieces using the CNC Router. To cut out the pieces I either used weights, clamps, or screws to hold down the wood so it wouldn't move. Then I moved the bit to its starting position and zeroed x and y and sensed z. I pressed start and repeated the process for all of my pieces.
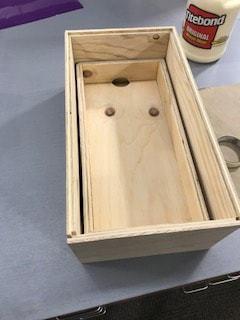
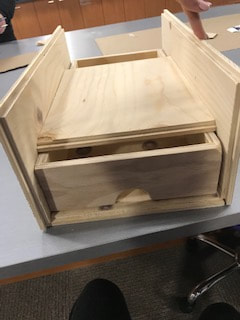
Assembly
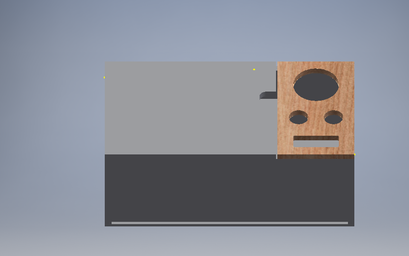
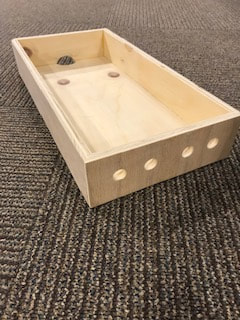
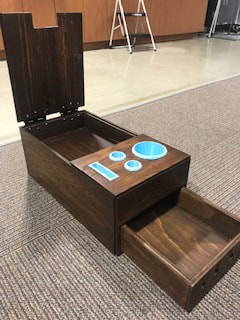
After some struggles with the CNC Router, I had to recut some of my pieces in the wood lab before I could assemble my organizer. First, I assembled my drawer and then built around it. Then, I glued together the sides and glued the remaining pieces together using clamps and cardboard to make sure everything was in place.
|

|
Inventor
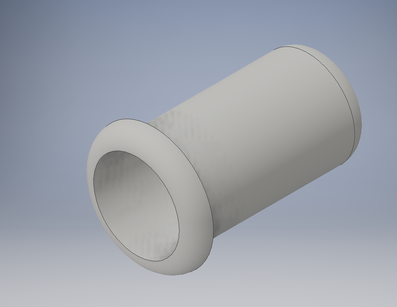
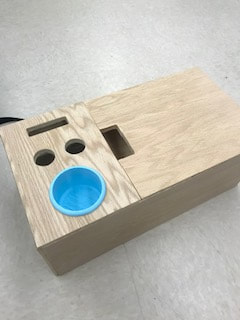
The part of my project was 3D printing the pieces that would go in the top of my organizer. I used Inventor to create a cup holder, pencil holders, and a post - it note holder. I made sure the cup holder was smaller than the hole on the organizer so it would fit and I put a lip on the outside so the cup holder wouldn't fall through. I did this for the remaining three pieces, and then I exported the files in CAD format and saved the files as stl files to be able to print them using MakerBot.
|
|
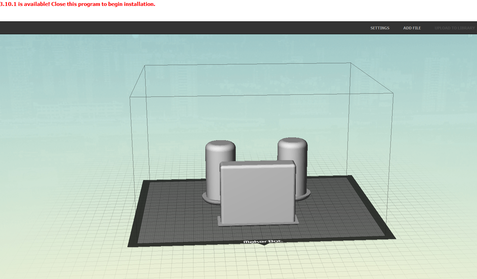
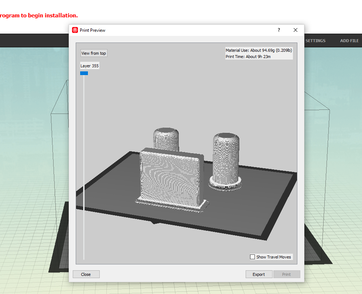
MakerBot
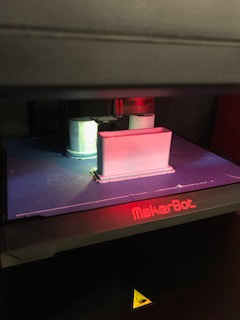
Once I opened the files in MakerBot, I scaled them to 1000%, added a raft, and added supports. I printed the cup holder first, and then printed the pencil holders and post - it note holder together. The cup holder took about 8 hours and the other three prints took 9 hours.
|
|
3D Printing
After all of the prints were done, I pulled off the rafts, supports, and made sure they fit in the organizer.
|

|
|
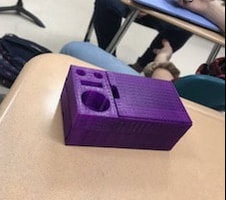
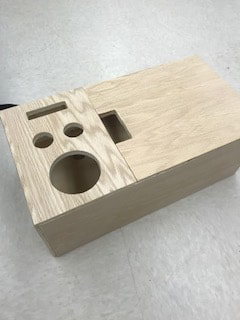
Finished Product
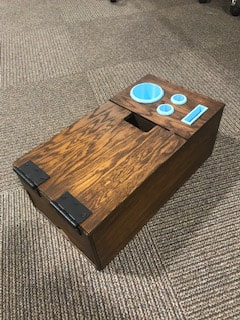
Once I knew that all of my 3D prints would fit, I glued the top piece onto the organizer. To finish my project, I stained the wood, put hinges on the lid, and put the 3D prints into the organizer.
|
|
What I learned
Throughout this semester, I have learned many things. I have learned that in order for the CNC Router to work properly you need to make sure your material is secure so it won't move. I also learned that many projects take some time to figure out how to get all of the parts to come together. It took me many tries to be able to get all of my pieces to fit together. I used the CNC Router and machines from the woods lab such as a table saw to make all of my pieces fit together.
